created by Utah State University Cataloging and Metadata Services Deptartment
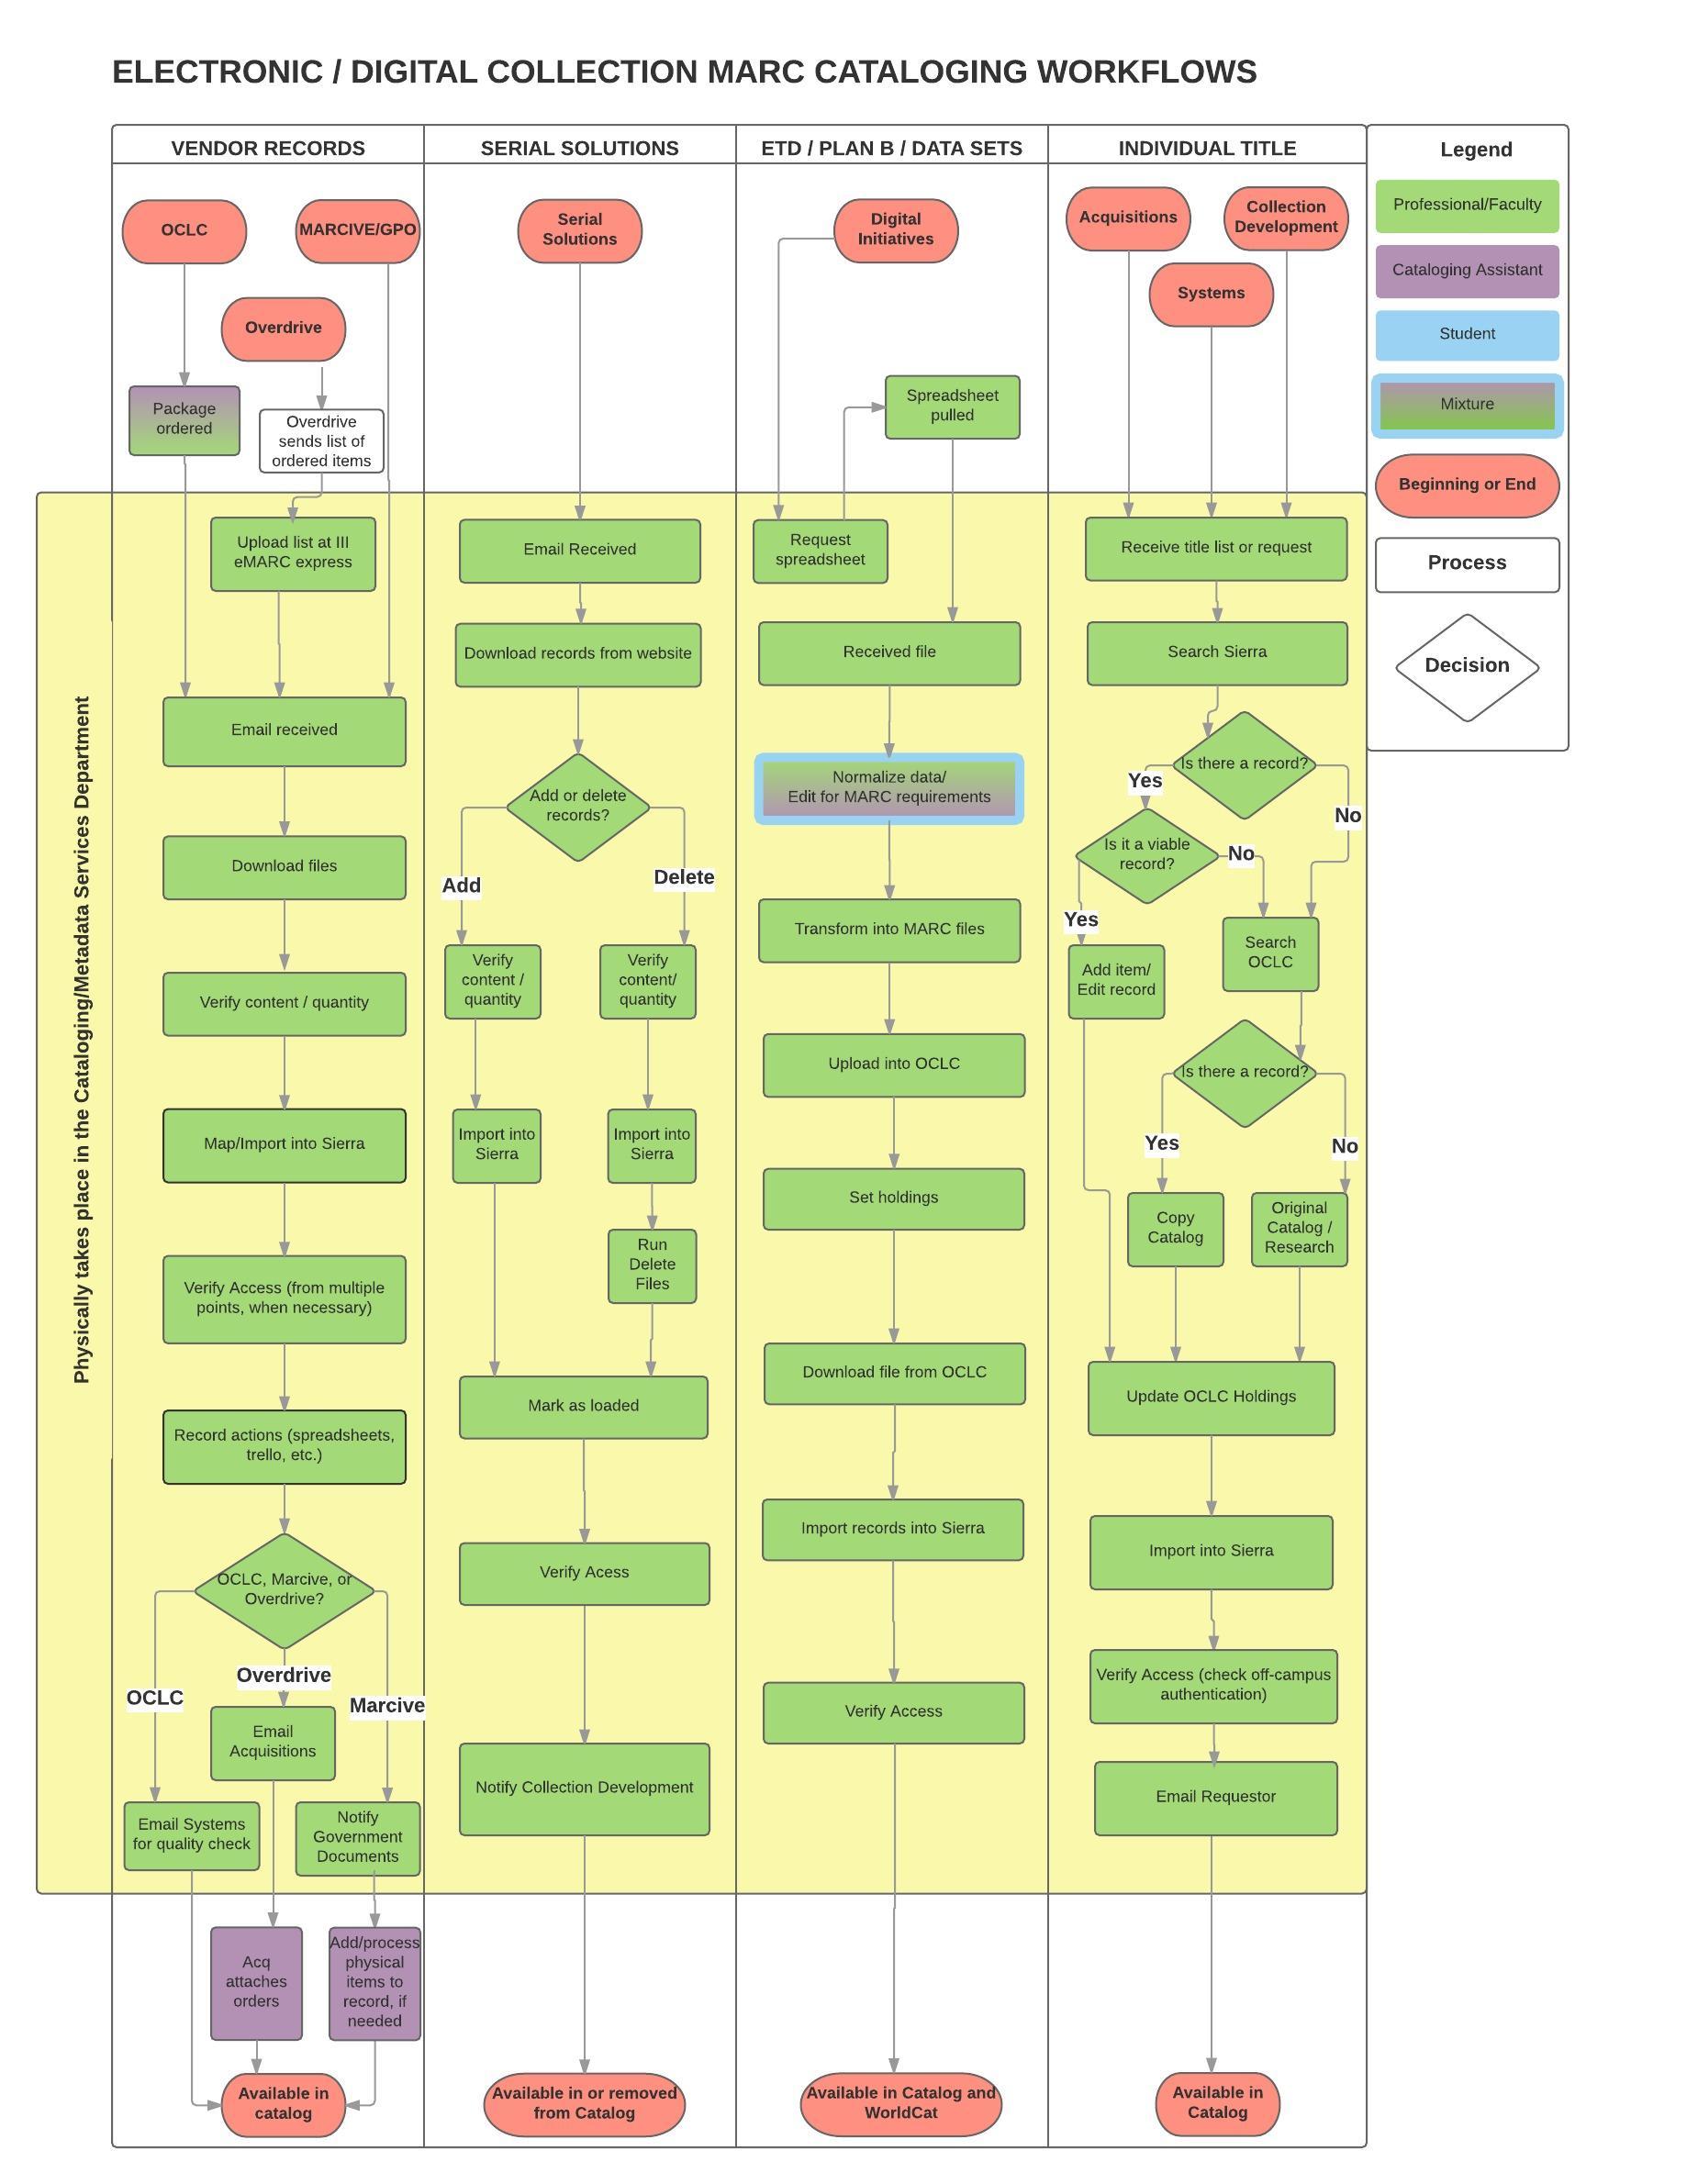
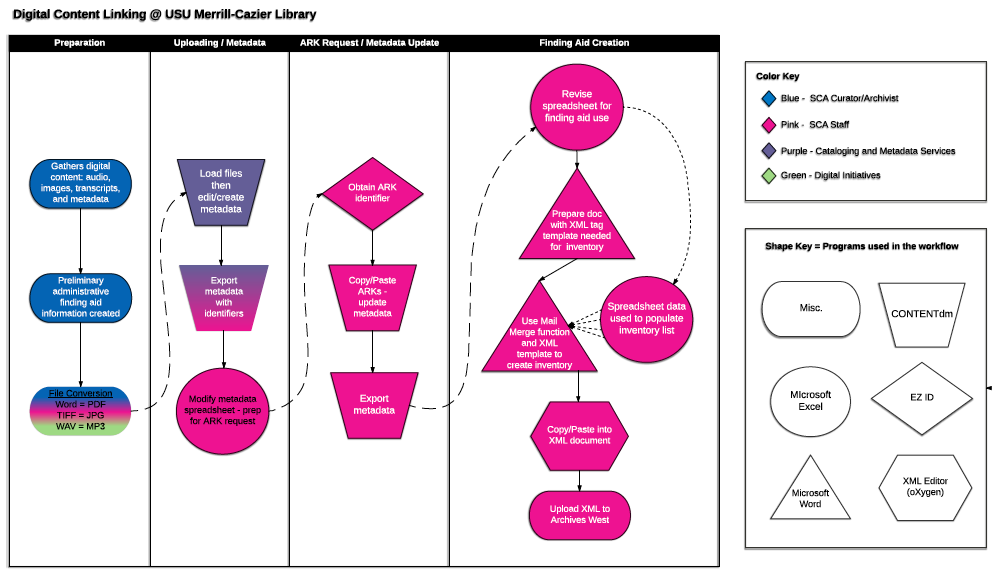
This process semi-automates the batch linking of item and folder level entries in EAD finding aids to the corresponding digitized material in a digital repository (for USU Libraries, this is CONTENTdm.) An overview of this workflow is available: http://journal.code4lib.org/articles/11997
Workflow for linking digital objects to corresponding items within EAD finding aids
Tools Needed:
- Microsoft Excel
- Microsoft Word
- XML Editor (such as oXygen)
Purpose
This workflow is a step-by-step process that utilizes robust digital collection metadata to create EAD finding aids linked to digital objects at the item or folder level using the <dao> tag. [i] The process outlined below assumes that the metadata for digital objects will include the following fields: title, date, format, call number (or at minimum the collection, series, box, or folder information), and most importantly, the URL to access the item.
Workflow
Step 1. Export collection metadata from the digital asset management system in a format that can be read as a spreadsheet. For example, as a tab-delimited or comma-separated file.[ii]
- Ensure that the title, format, date, call number (or at minimum it should include the collection, series, box, or folder information), and URL fields are included. Having the call number split out into separate entities (series, box, folder, or item numbers) is preferred.
Step 2. Edit the metadata for EAD
- Open the collection metadata file in Microsoft Excel.
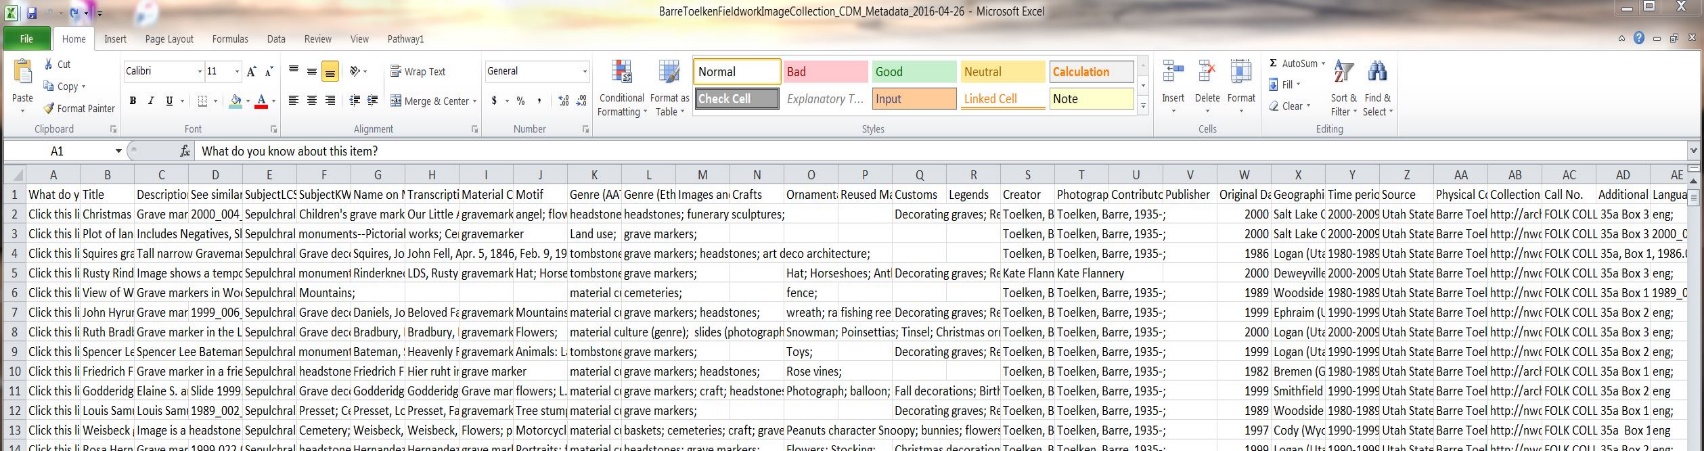 Figure 1 – Digital collection metadata downloaded as a tab delimited file
- Edit the spreadsheet to only include fields necessary for the EAD guide. Eliminate all metadata columns except the following:
- Title
- Format
- Date
- Call Number (or call number related fields)
- URL
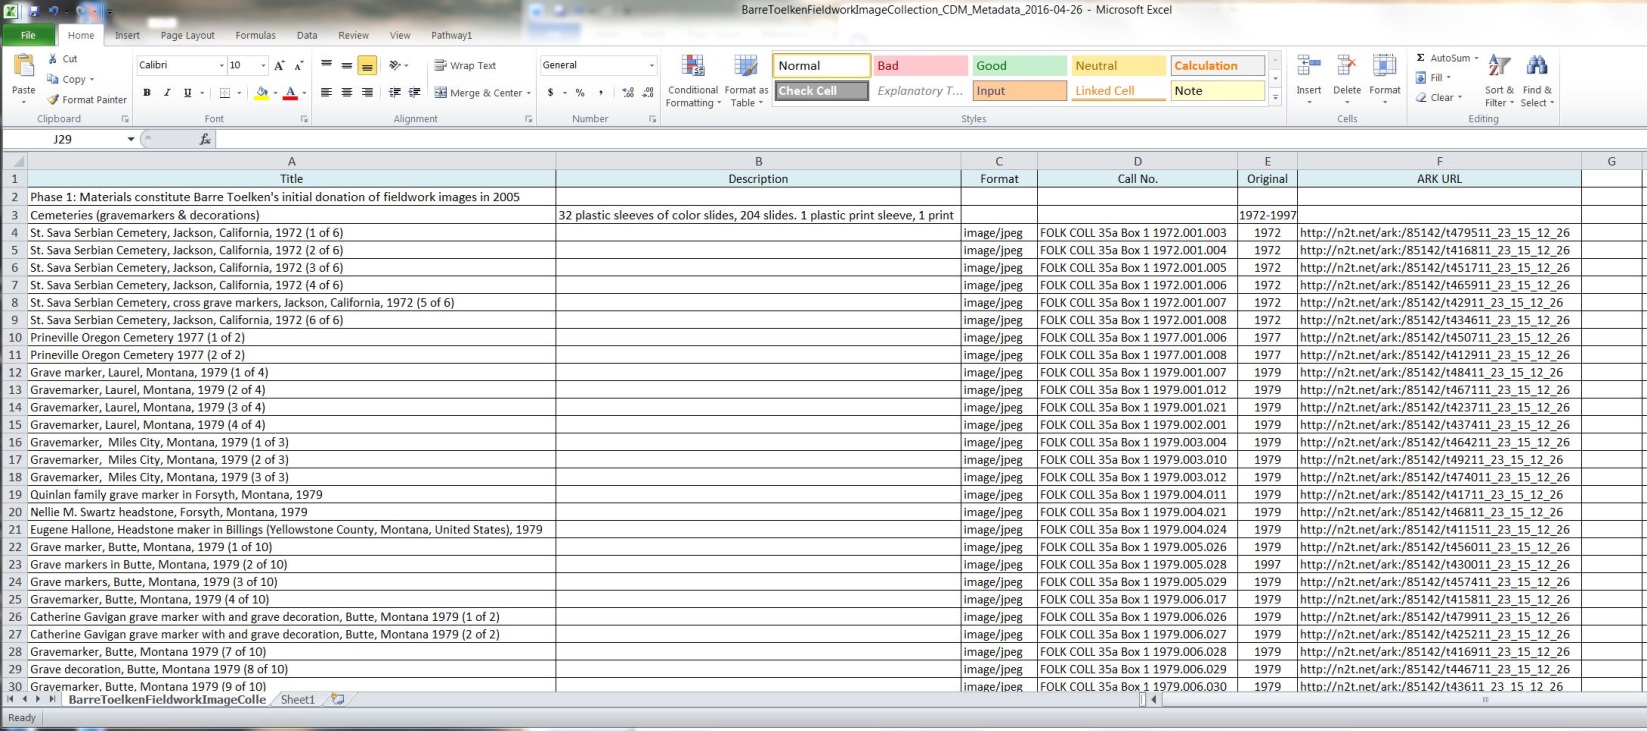 Figure 2 – Edited Spreadsheet data (only including fields for EAD)
- Check the entries and ensure that they are complete. The minimum requirement is Title and URL.
- Depending on the complexity of the collection’s hierarchy, insert at least five empty columns at the beginning of the sheet and title them as follows (*columns reflected with an asterisk will vary and will need to reflect the hierarchical depth of the physical collection):
- Component Level
- Component Number
- Box
- Folder
- *Item*
- If the call number is not split out, add additional empty columns before/next to the “Call Number” column. These will serve as a workspace for separating the call number information into box, folder, or item numbers in the next step.
- Separate the call number information into series, box, folder, item, etc. There are several Excel formulas that can help automate this. One useful formula is:
Example Formula:
=MID(D2, 2,1) – This extracts certain characters within the text string. For this example, the first call number listed below is 01:01:01. This refers to Box 1, Folder 1, Item 1 in the collection. To extract each element, use the formula =MID(D2,2,1) which refers to cell “D2”, starting with the 2nd character and directs the program to extract 1 character. This will extract the number “1” and place it in the cell the formula is initially entered in. Replace the cell reference, starting character number and number of characters to obtain the specific series, box, folder, or item numbers necessary.
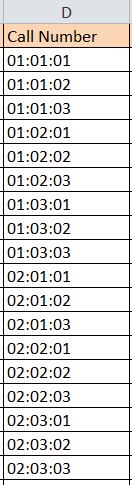
Figure 3 – Example Call Number (represents a collection with Box, Folder, and Item numbers reflected in the call number)
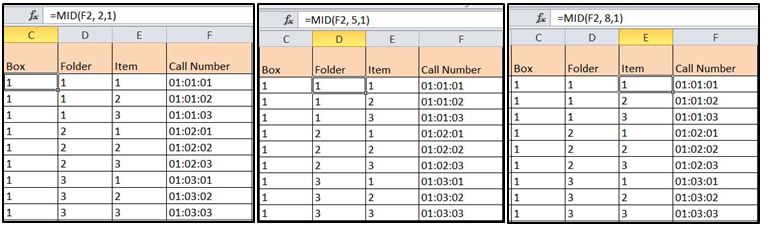 Figure 4 – How to use formulas to split the call number information into individual columns
- When all of the separated information is sorted into the appropriate columns and rows as depicted above, copy and paste the columns as values. This can be done as follows:
- Highlight the columns that have the separated call number information
- Right click to copy the columns
- Right click again in the same location and select “Paste Special”
- Select “Values” – this will get rid of the formula information within the cells and just keep the product of the formula instead
- Sort the entries in Call Number order and reflect the hierarchical structure of the physical collection.
- In the Component Level column, indicate the component type using the approved EAD <c> level elements.[iii] In the Component Number column, indicate the component level number (ie. <c01> through <c12>.) However, only indicate the variable number and do not include the “c” or “c0”portion of the element.
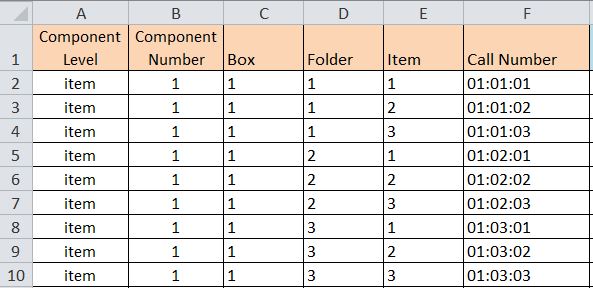
Figure 5 –Adding Component Level and Component Number Information (Note: this particular example has no hierarchy)
- Delete the Call Number column and any other “workspace” columns that were used to separate data.
- Add a column at the end with the header: Resource Label
- In the Resource Label column, enter the text that will be displayed as the link to the user. Copy the text for all rows. (For example, “Click to Access” or “Click to view.”)
- The final spreadsheet should have the following columns (*columns reflected with an asterisk will vary and will need to reflect the hierarchical depth of the physical collection)
- Component Level
- Component Number
- Box*
- Folder*
- Item*
- Title
- Format
- Date
- URL
- Resource Label
- Add in additional rows as necessary to create <c> level information for series, boxes, or folders that are not digital objects, but will serve as headers in the EAD guide. (see rows 2 and 3 in Figure 6 below for an example.)
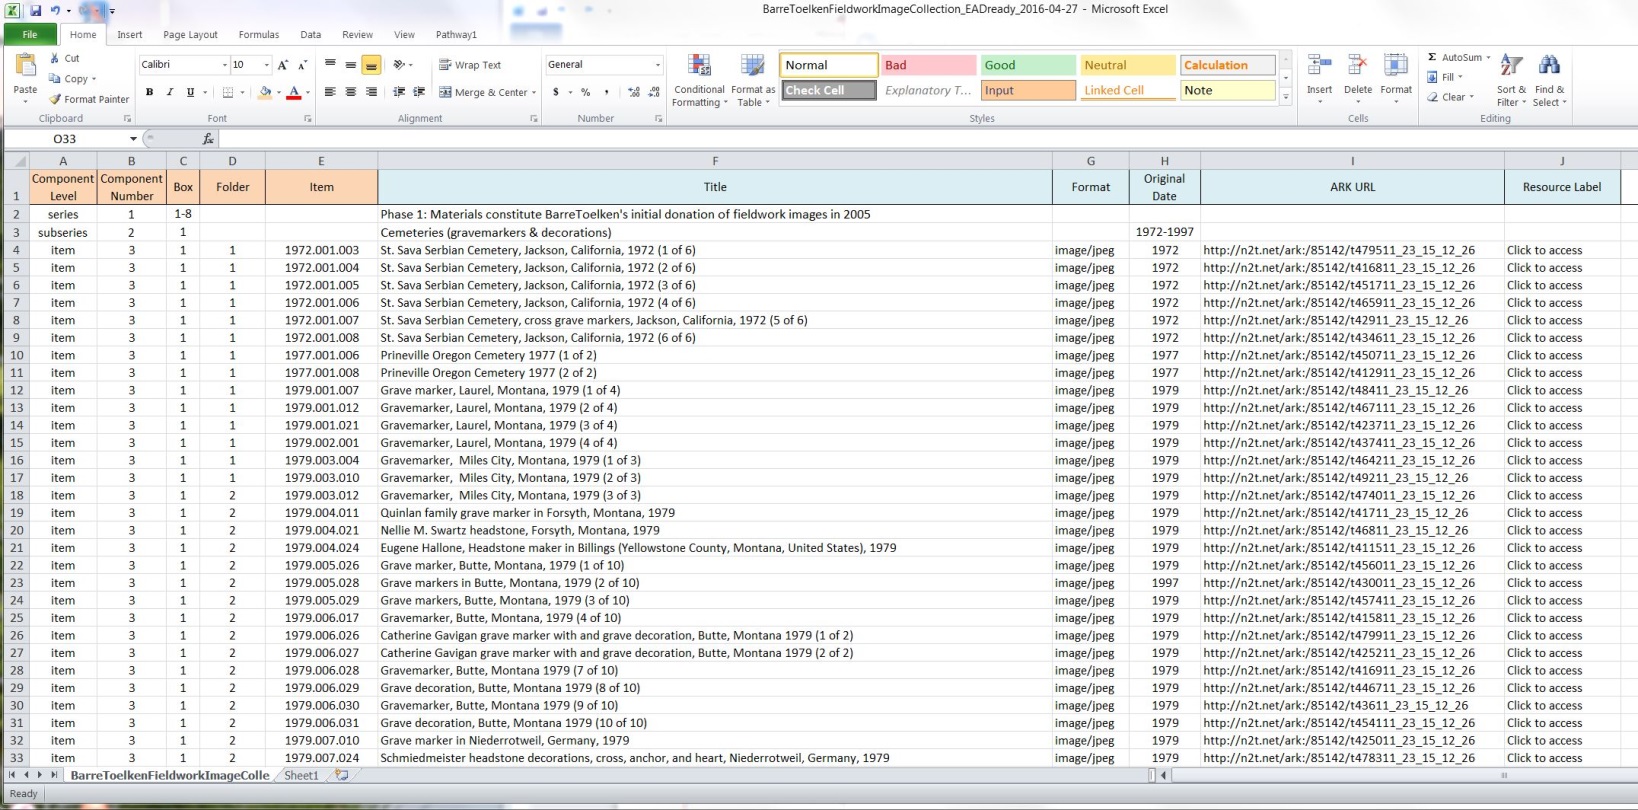 Figure 6 – Example of a final spreadsheet (using collection data as seen in Figure 1 – Note: this collection has a hierarchy)
Step 3. Use the Mail Merge function to create a new XML container list with links to digital content [iv]
Once finished making the necessary edits to the spreadsheet, the next step is to utilize the mail merge function in Microsoft Word to create a new XML container list for the finding aid with the new links to digital content embedded.
- To begin open a new Word document and insert an XML template like the one listed below. This template should represent the XML coding needed for a single item in a collection and you want to be sure to include the digital archival object <dao> and any attribute tagging necessary for the content linking to operate effectively. The parts of the XML template that are highlighted in the angle brackets will be variable while the rest of the text will stay constant, or fixed.
Template for use with xlink namespace:
<c0«Component_Number»level=”«Component_Level»”>
<did>
<container type=”box”>«Box»</container>
<container type=”folder”>«Folder»</container>
<unitid>«Item»</unitid>
<unittitle encodinganalog=”title”>«Title»</unittitle>
<daogrp>
<resource xlink:label=”start”>«Resource_Label»</resource>
<daoloc xlink:label=”image” xlink:href=”«ARK_URL»” xlink:title=”digital image of «Title»”
xlink:role=”«Format»”/>
<arc xlink:form=”start” xlink:to=”image” xlink:show=”new” xlink:actuate=”onRequest”/>
</daogrp>
<unitdate>«Date»</unitdate>
</did>
</c0«Component_Number»>
Template for use without xlink namespace
<c0«Component_Number»level=”«Component_Level»”>
<did>
<container type=”box”>«Box»</container>
<container type=”folder”>«Folder»</container>
<unitid>«Item»</unitid>
<unittitle encodinganalog=”title”>«Title»</unittitle>
<daogrp>
<resource label=”start”>«Resource_Label»</resource>
<daoloc label=”image” href=”«ARK_URL»” title=”digital image of «Title»”
role=”«Format»”/>
<arc form=”start” to=”image” show=”new” actuate=”onRequest”/>
</daogrp>
<unitdate>«Date»</unitdate>
</did>
</c0«Component_Number»>
- The highlighted portions above represent where the data from each column in the spreadsheet will be placed. As each row in the spreadsheet represents a new digital item, it will create a new a new <c0> unit for each row
- To perform the mail merge, first go to the mailings tab in Word and click “Start Mail Merge.” Make sure “Normal Word Document” is selected.
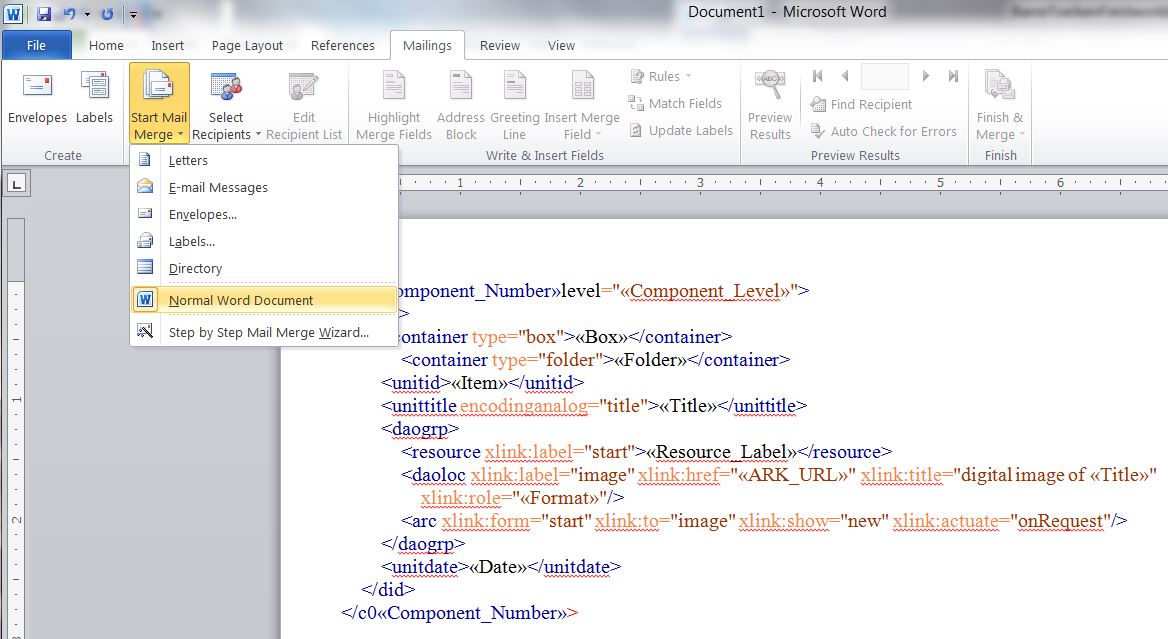 Figure 7 – In the “Mailings” Tab select “Start the Mail Merge.” Make sure “Normal Word Document” is selected.
- Click “Select Recipients” and choose “Use Existing List”
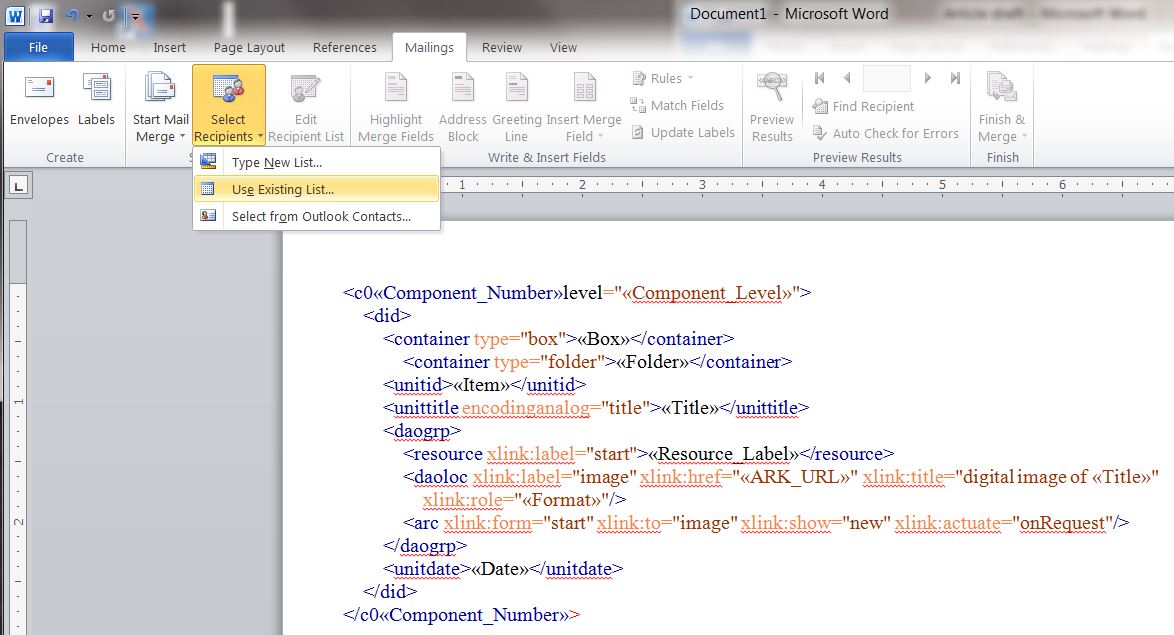 Figure 8 – Select an existing list (the edited spreadsheet)
- A new window will open. Select a table and then select the correct spreadsheet.
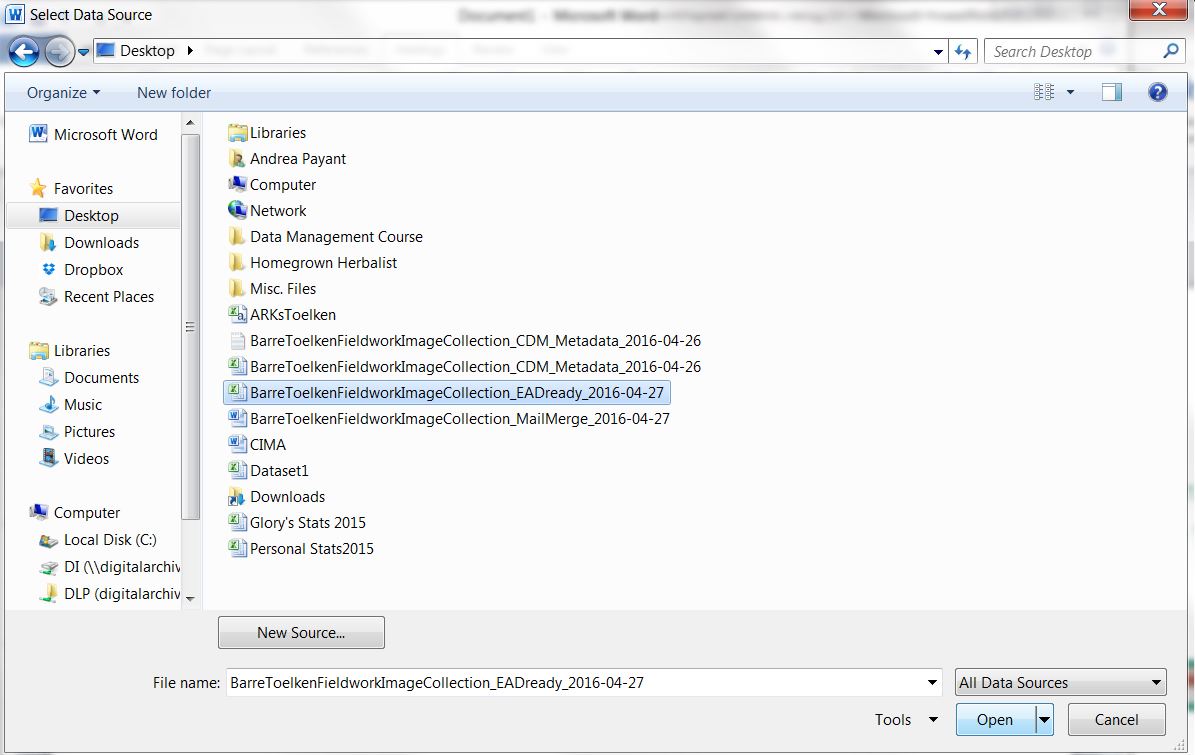 Figure 9 – Select Table (the edited spreadsheet again)
- Select the specific sheet in the spreadsheet file to use as the data source.
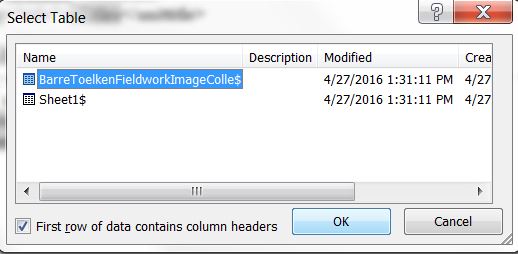
Figure 10 – Select the data source (sheet)
- Next, assign columns from the spreadsheet to the corresponding EAD elements in the XML template. Begin by highlighting the first variable EAD element, then go to “Insert Merge Field” then select the matching field from the drop down list. Repeat the same process for each of the variable EAD elements in the template.
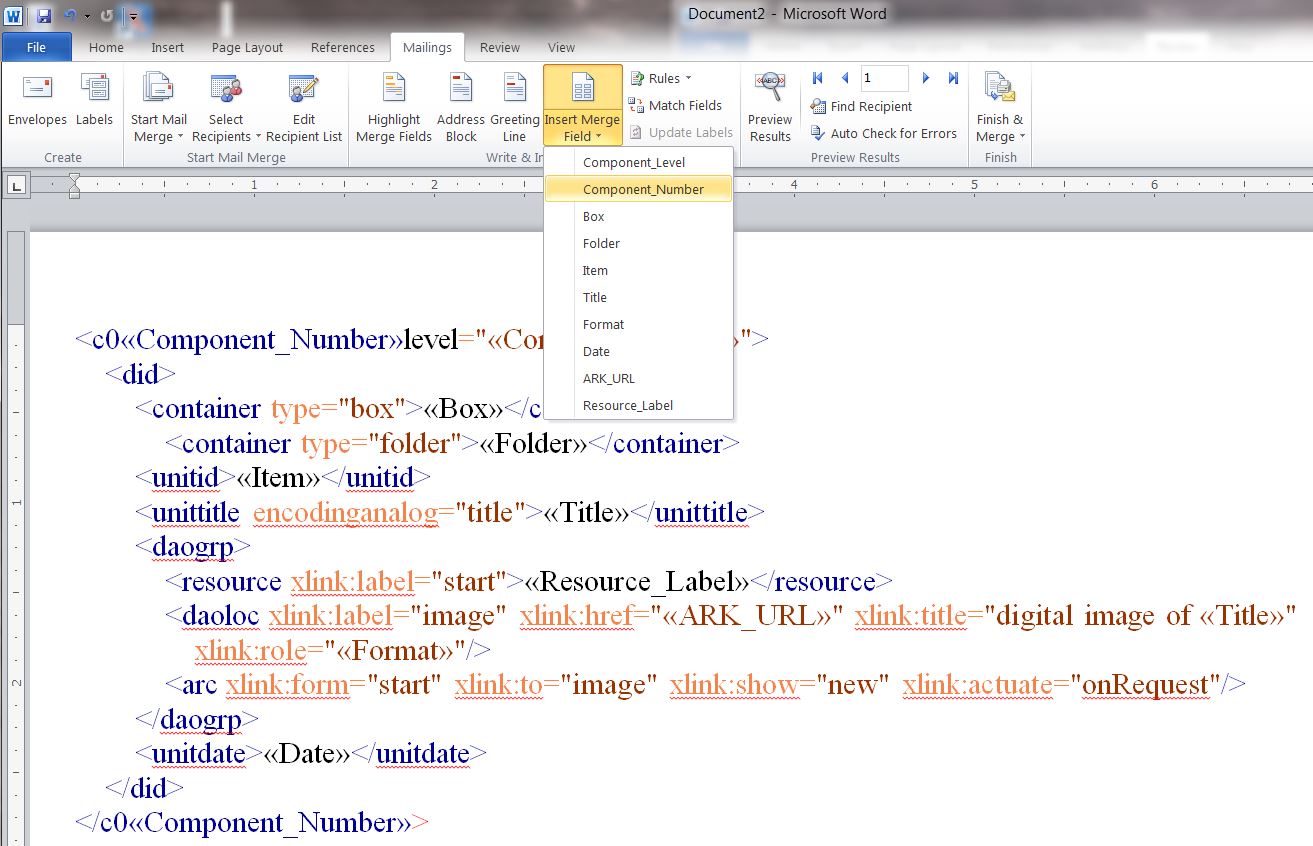 Figure 11 – Inserting merge fields for each column of information from your spreadsheet matching them to corresponding placeholder in the template
- Once finished, complete the merge by selecting “Finish & Merge,” then select “Edit Individual Document.” A new window will open. Choose “All”
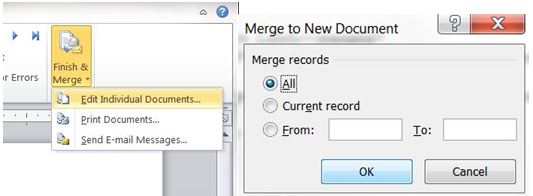
Figure 12 – Finish and merge all the records to generate a new word document
- A new word document will be produced and the XML coding for each of the items in the collection will be visible with information inserted from the spreadsheet. One entry will be displayed on each page of the document
 Figure 13 – A new word document with data populated by your spreadsheet in corresponding places within XML
- Remove the extra blank space between entries by using the find and replace function in Word. Use ^b to find blanks and replace with ^|^| . This will insert two empty lines or manual line breaks between the entries.
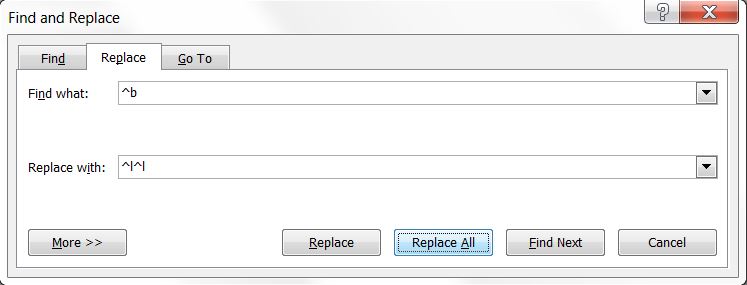 Figure 14 – Removing blank space in the document
- The word document should look like this:
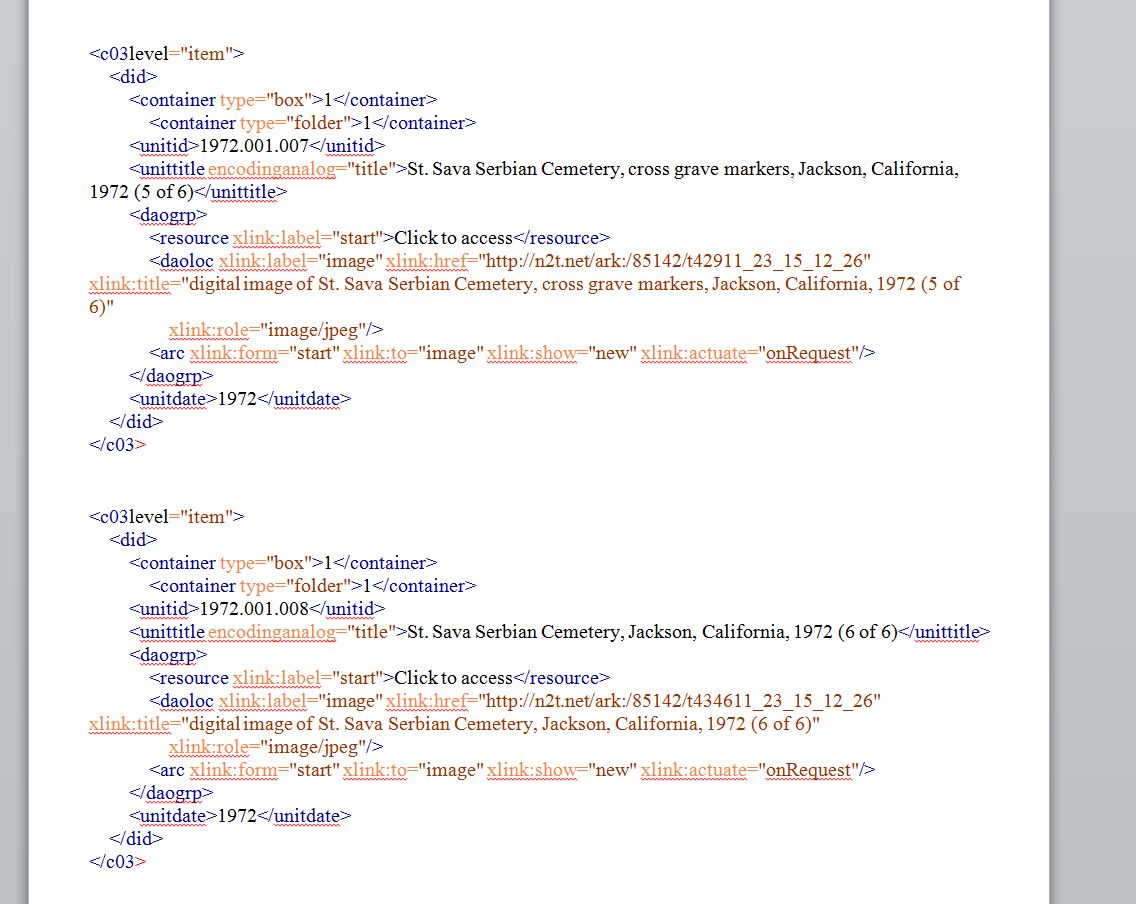
Figure 15 – A completed XML container list in word
- Make any necessary edits to finalize the XML container list (like removing empty tags.)
- Copy the container list in Word and paste it into the <dsc> section of the master XML file for of the collection’s finding aid, overlaying the previous <dsc> content. Perform quality control on the XML. NOTE: If the digital collection is a not a 1-to-1 relationship with the physical collection, some edits may need to be made. It may be advisable to only copy and paste specific sections of the newly minted XML. If the digital content only reflects random individual items in a collection, the process will need to be adjusted to copy and paste single items at a time.
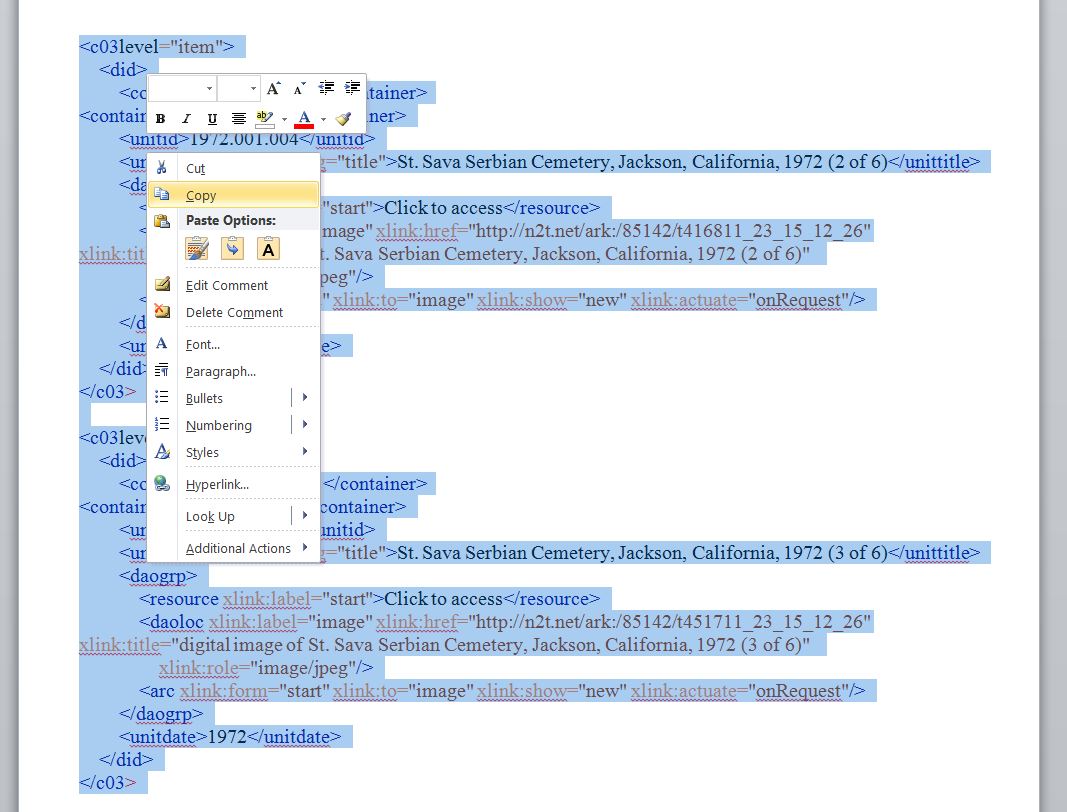 Figure 16 – Copy the container list
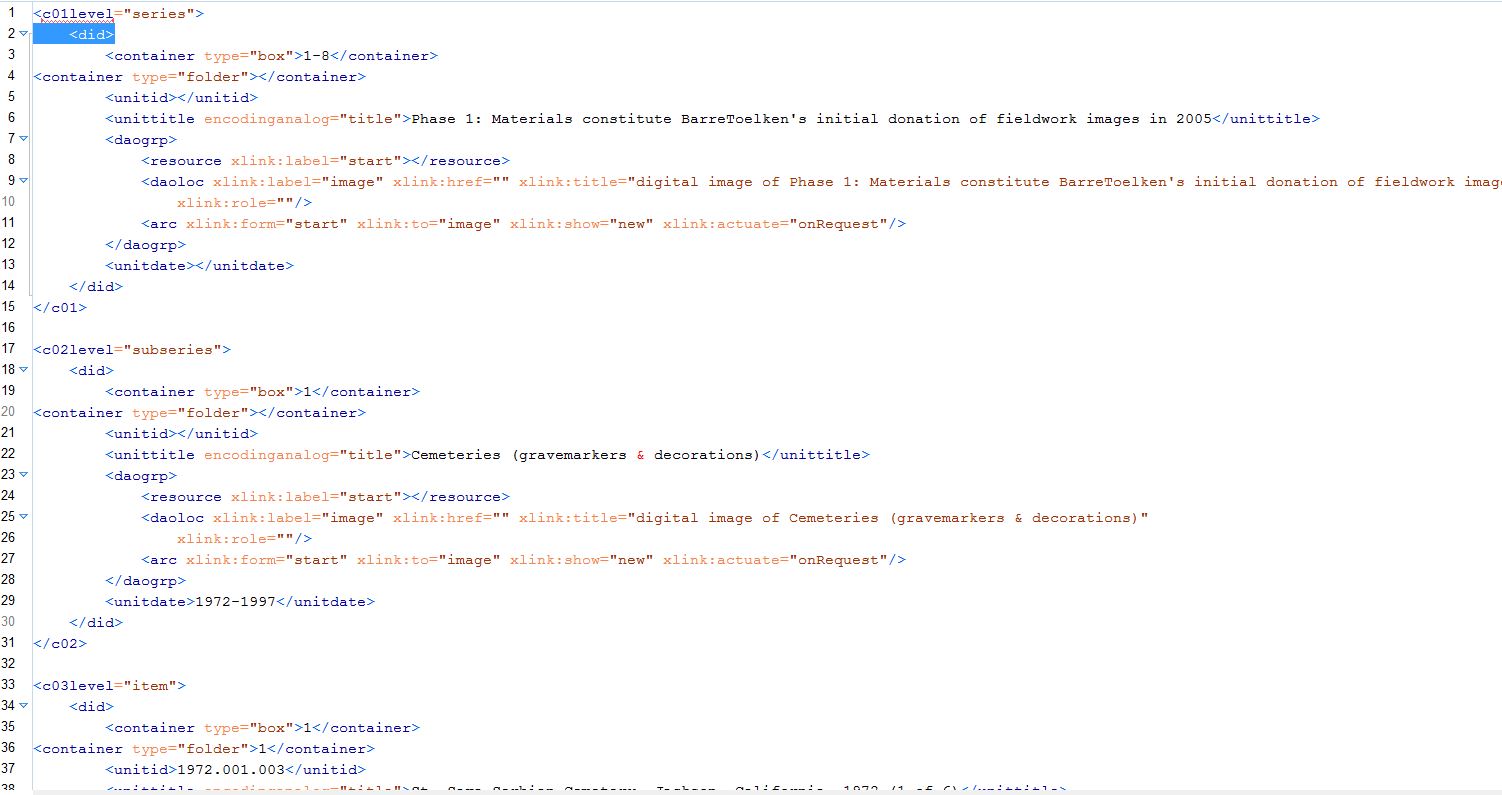 Figure 17 – Paste the container list into the <dsc> section of the master finding aid
- Once finished, upload your new finding aid complete with direct links to digital objects
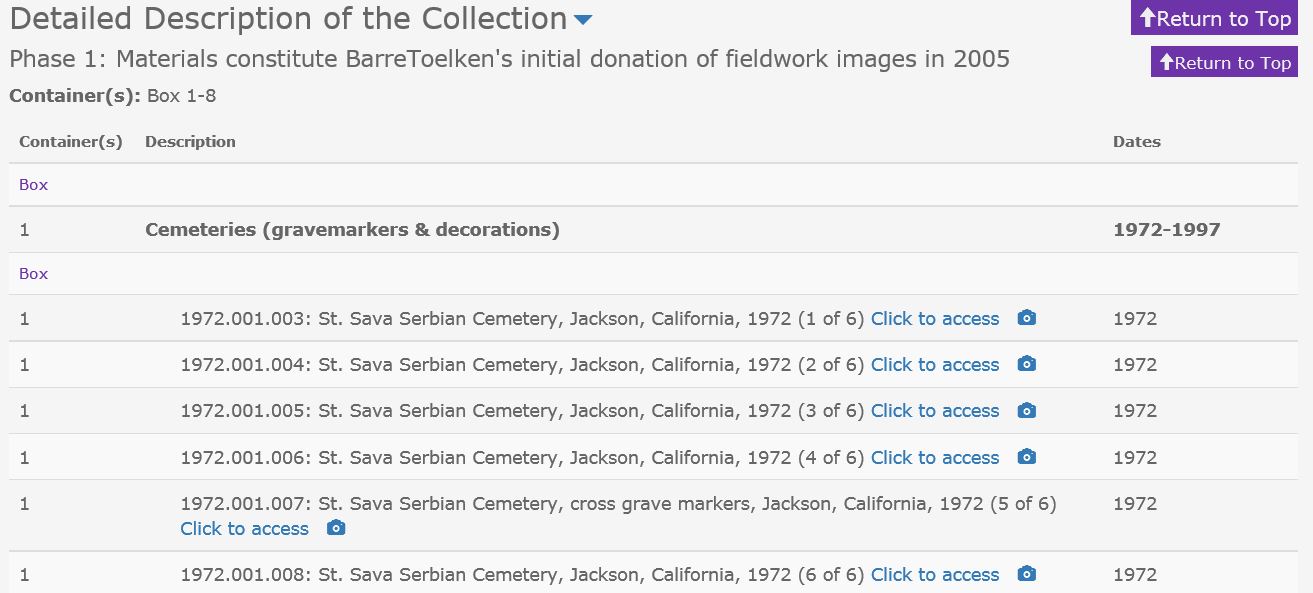 Figure 18 – The finding aid complete with links to digital objects in Archives West (Note: folder information is not seen here because it was added in the above procedures for demonstration purposes only. For this collection, “1972.001.003” is a single item number and not a box or folder number.)
Notes and Uses
This batch process can be used in two ways to provide digital content links: a new XML formatted container list for an EAD finding aid or an updated version of an existing container list. With regards to updating an existing EAD container list, this process is most accommodating for digital collections that share a 1-to1 relationship with the physical collection, where all items in the physical collection have been digitized and are housed in one single digital collection. Digital collections that contain more than one physical collection will be more problematic and require additional steps to sort. Likewise, digital collections with content that comprise only a portion of a physical collection, instead of all of it, will also require additional steps.
_____________________________________________________________________________
[iv] The mail merge process was not created by Utah State University, but was shared by the Utah State Archives with USU Libraries in 2008. It can be found here: http://archives.utah.gov/research/inventories/ead.html


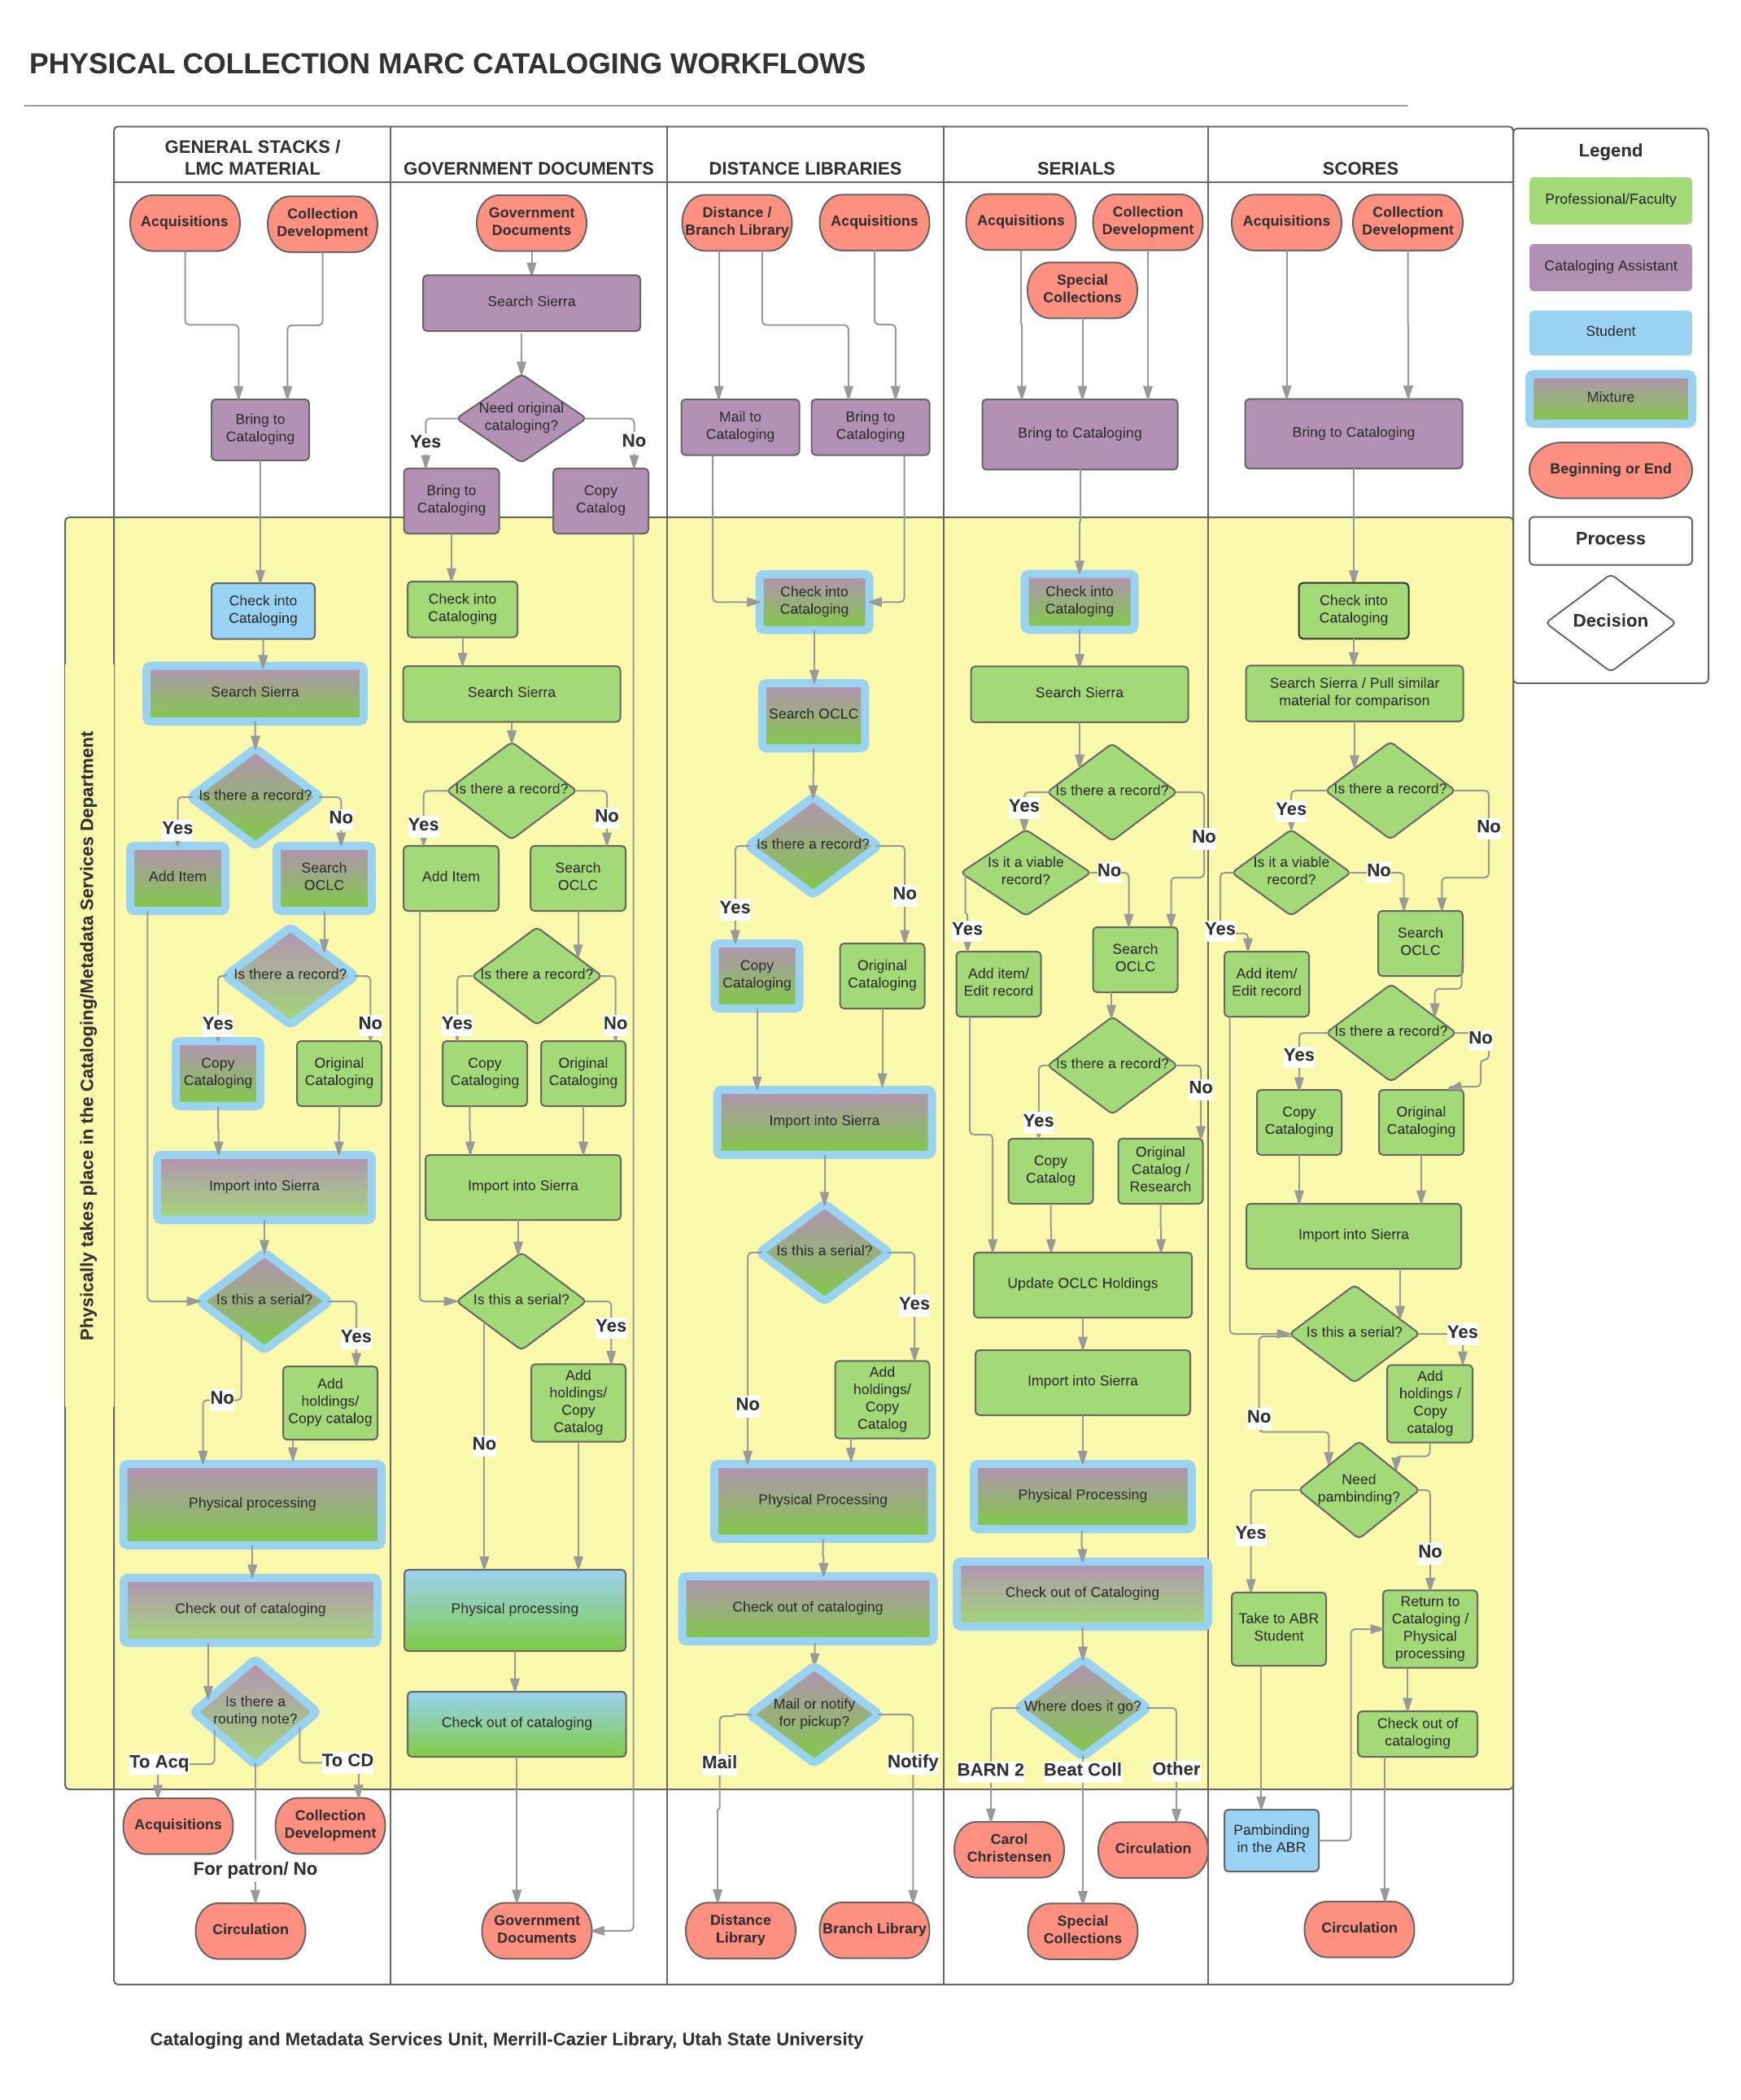
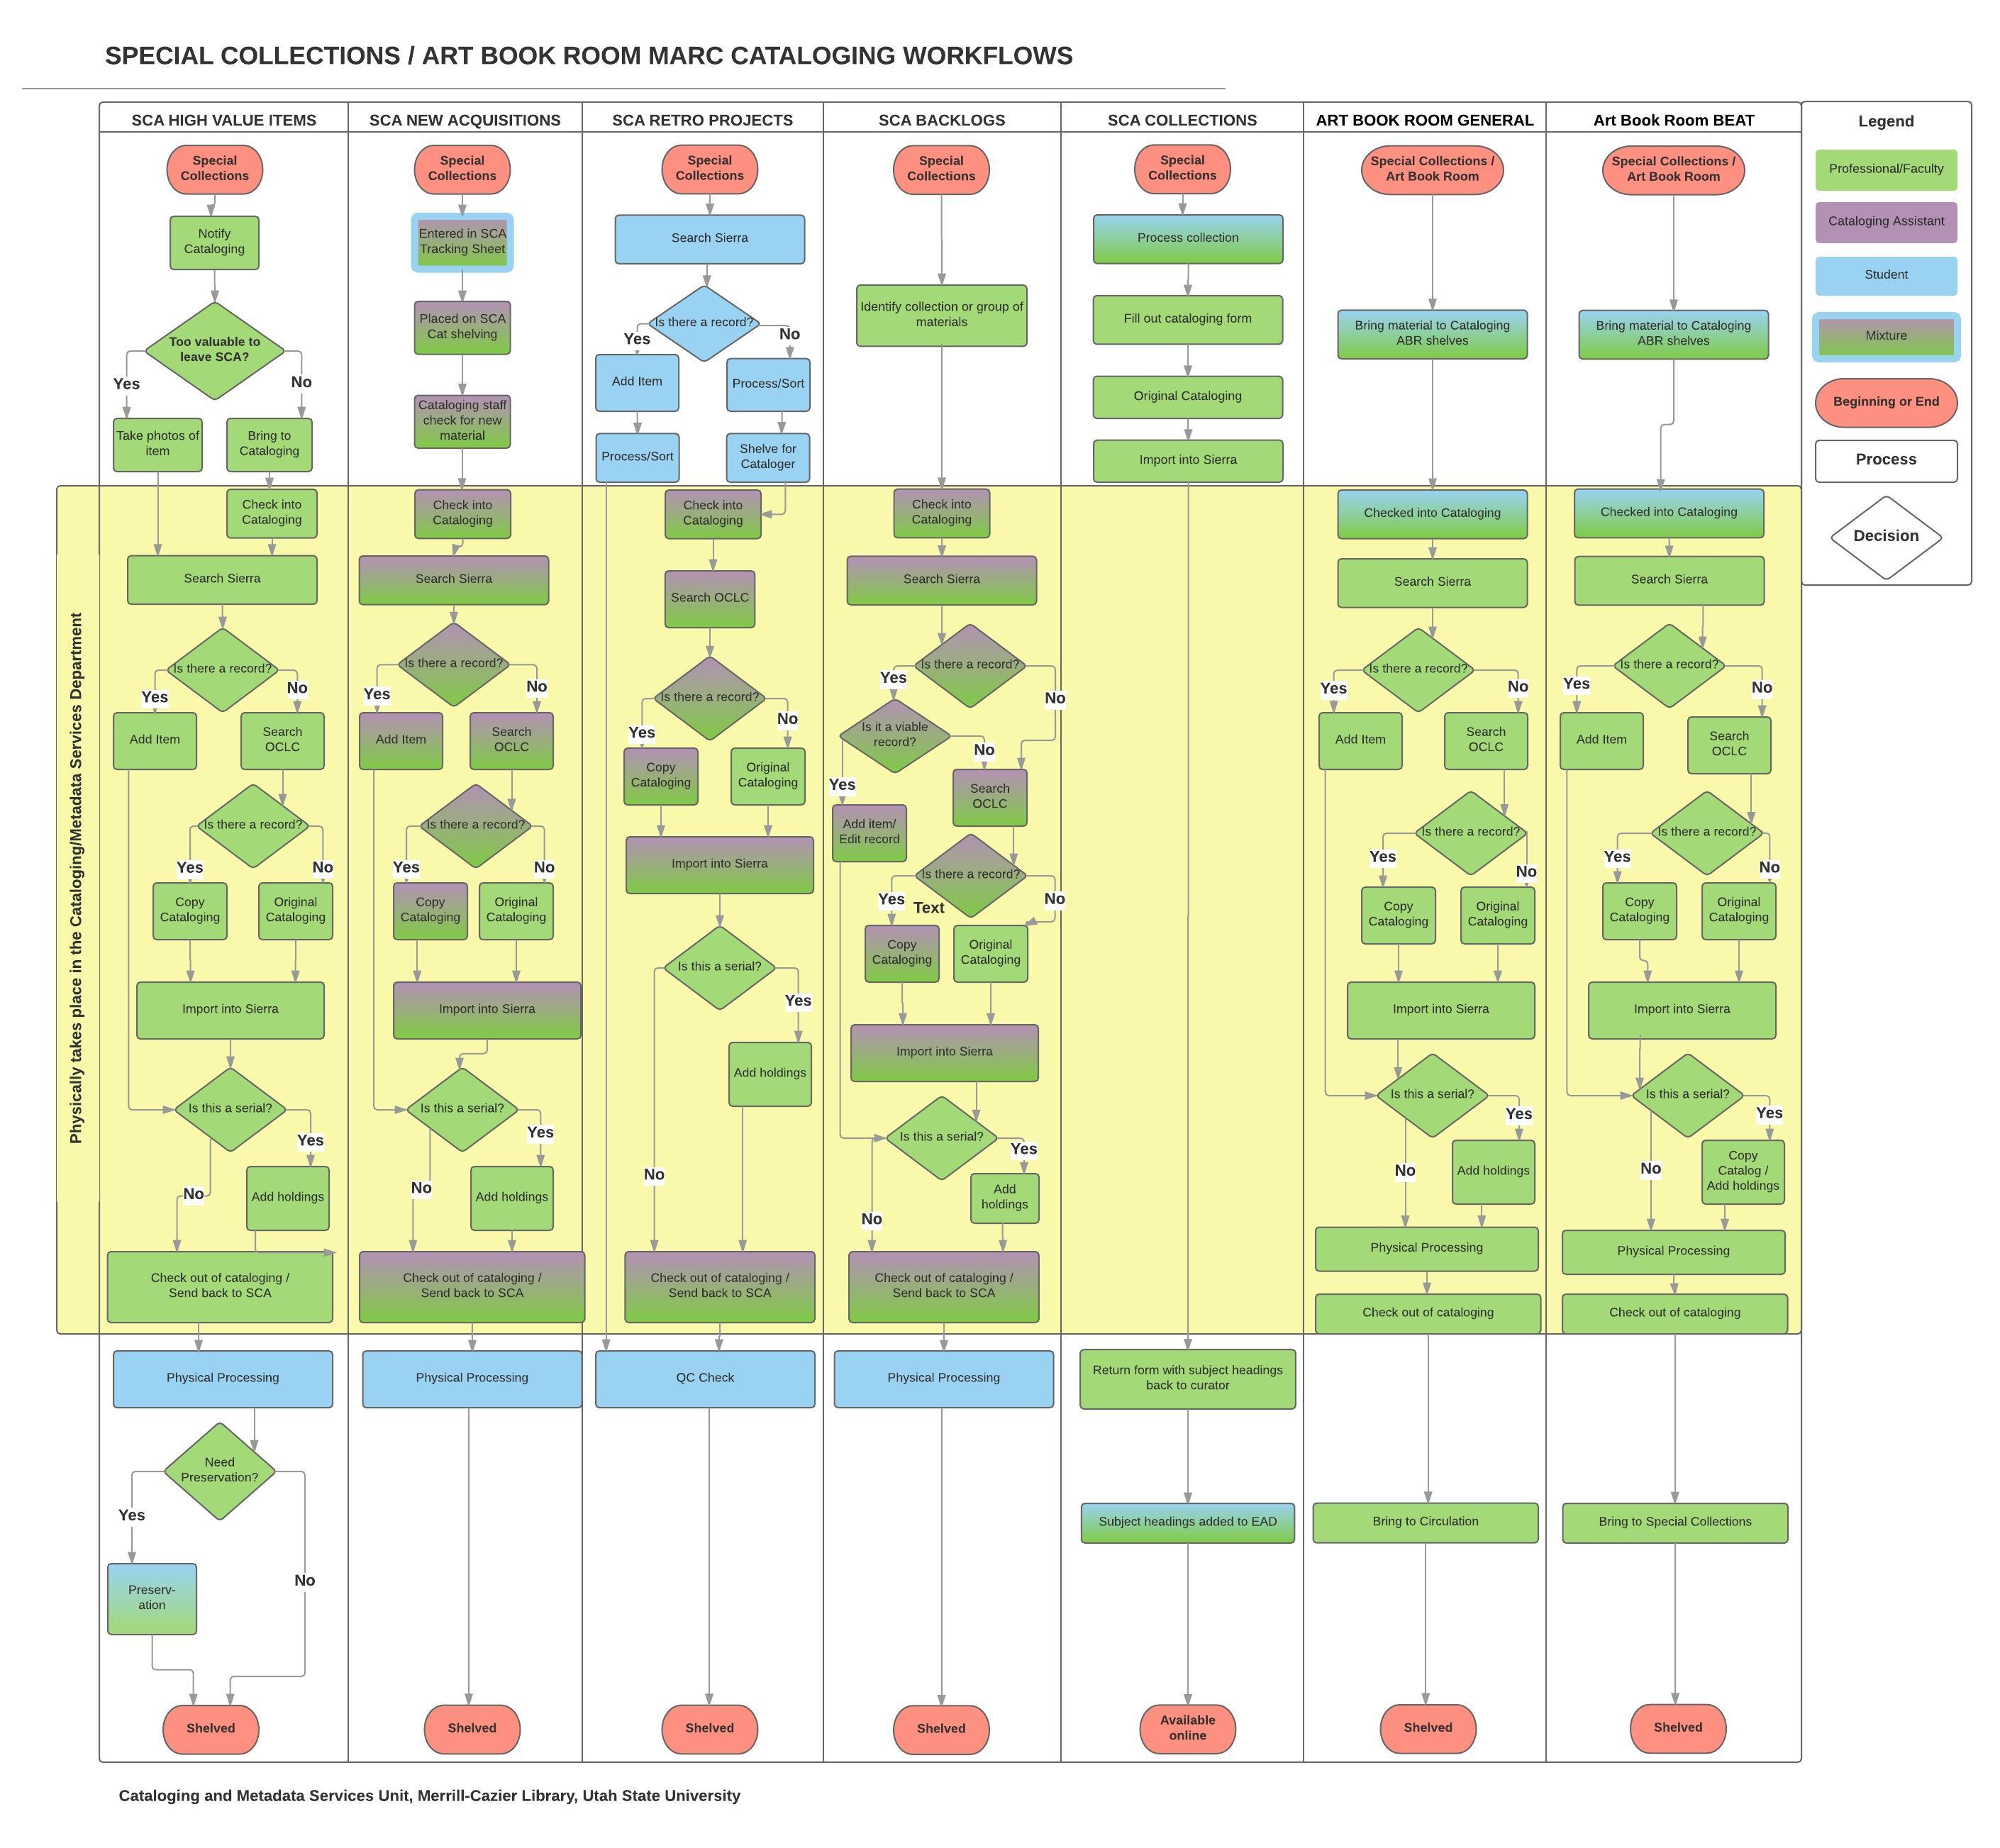
 This workflow diagram was made using LucidChart.